In order to access the suspension springs, we have to turn the TT upside down paying attention to the oil in the bearing shaft housing: if it is old, it is better to remove it, otherwise you can just put a plug in the hole.
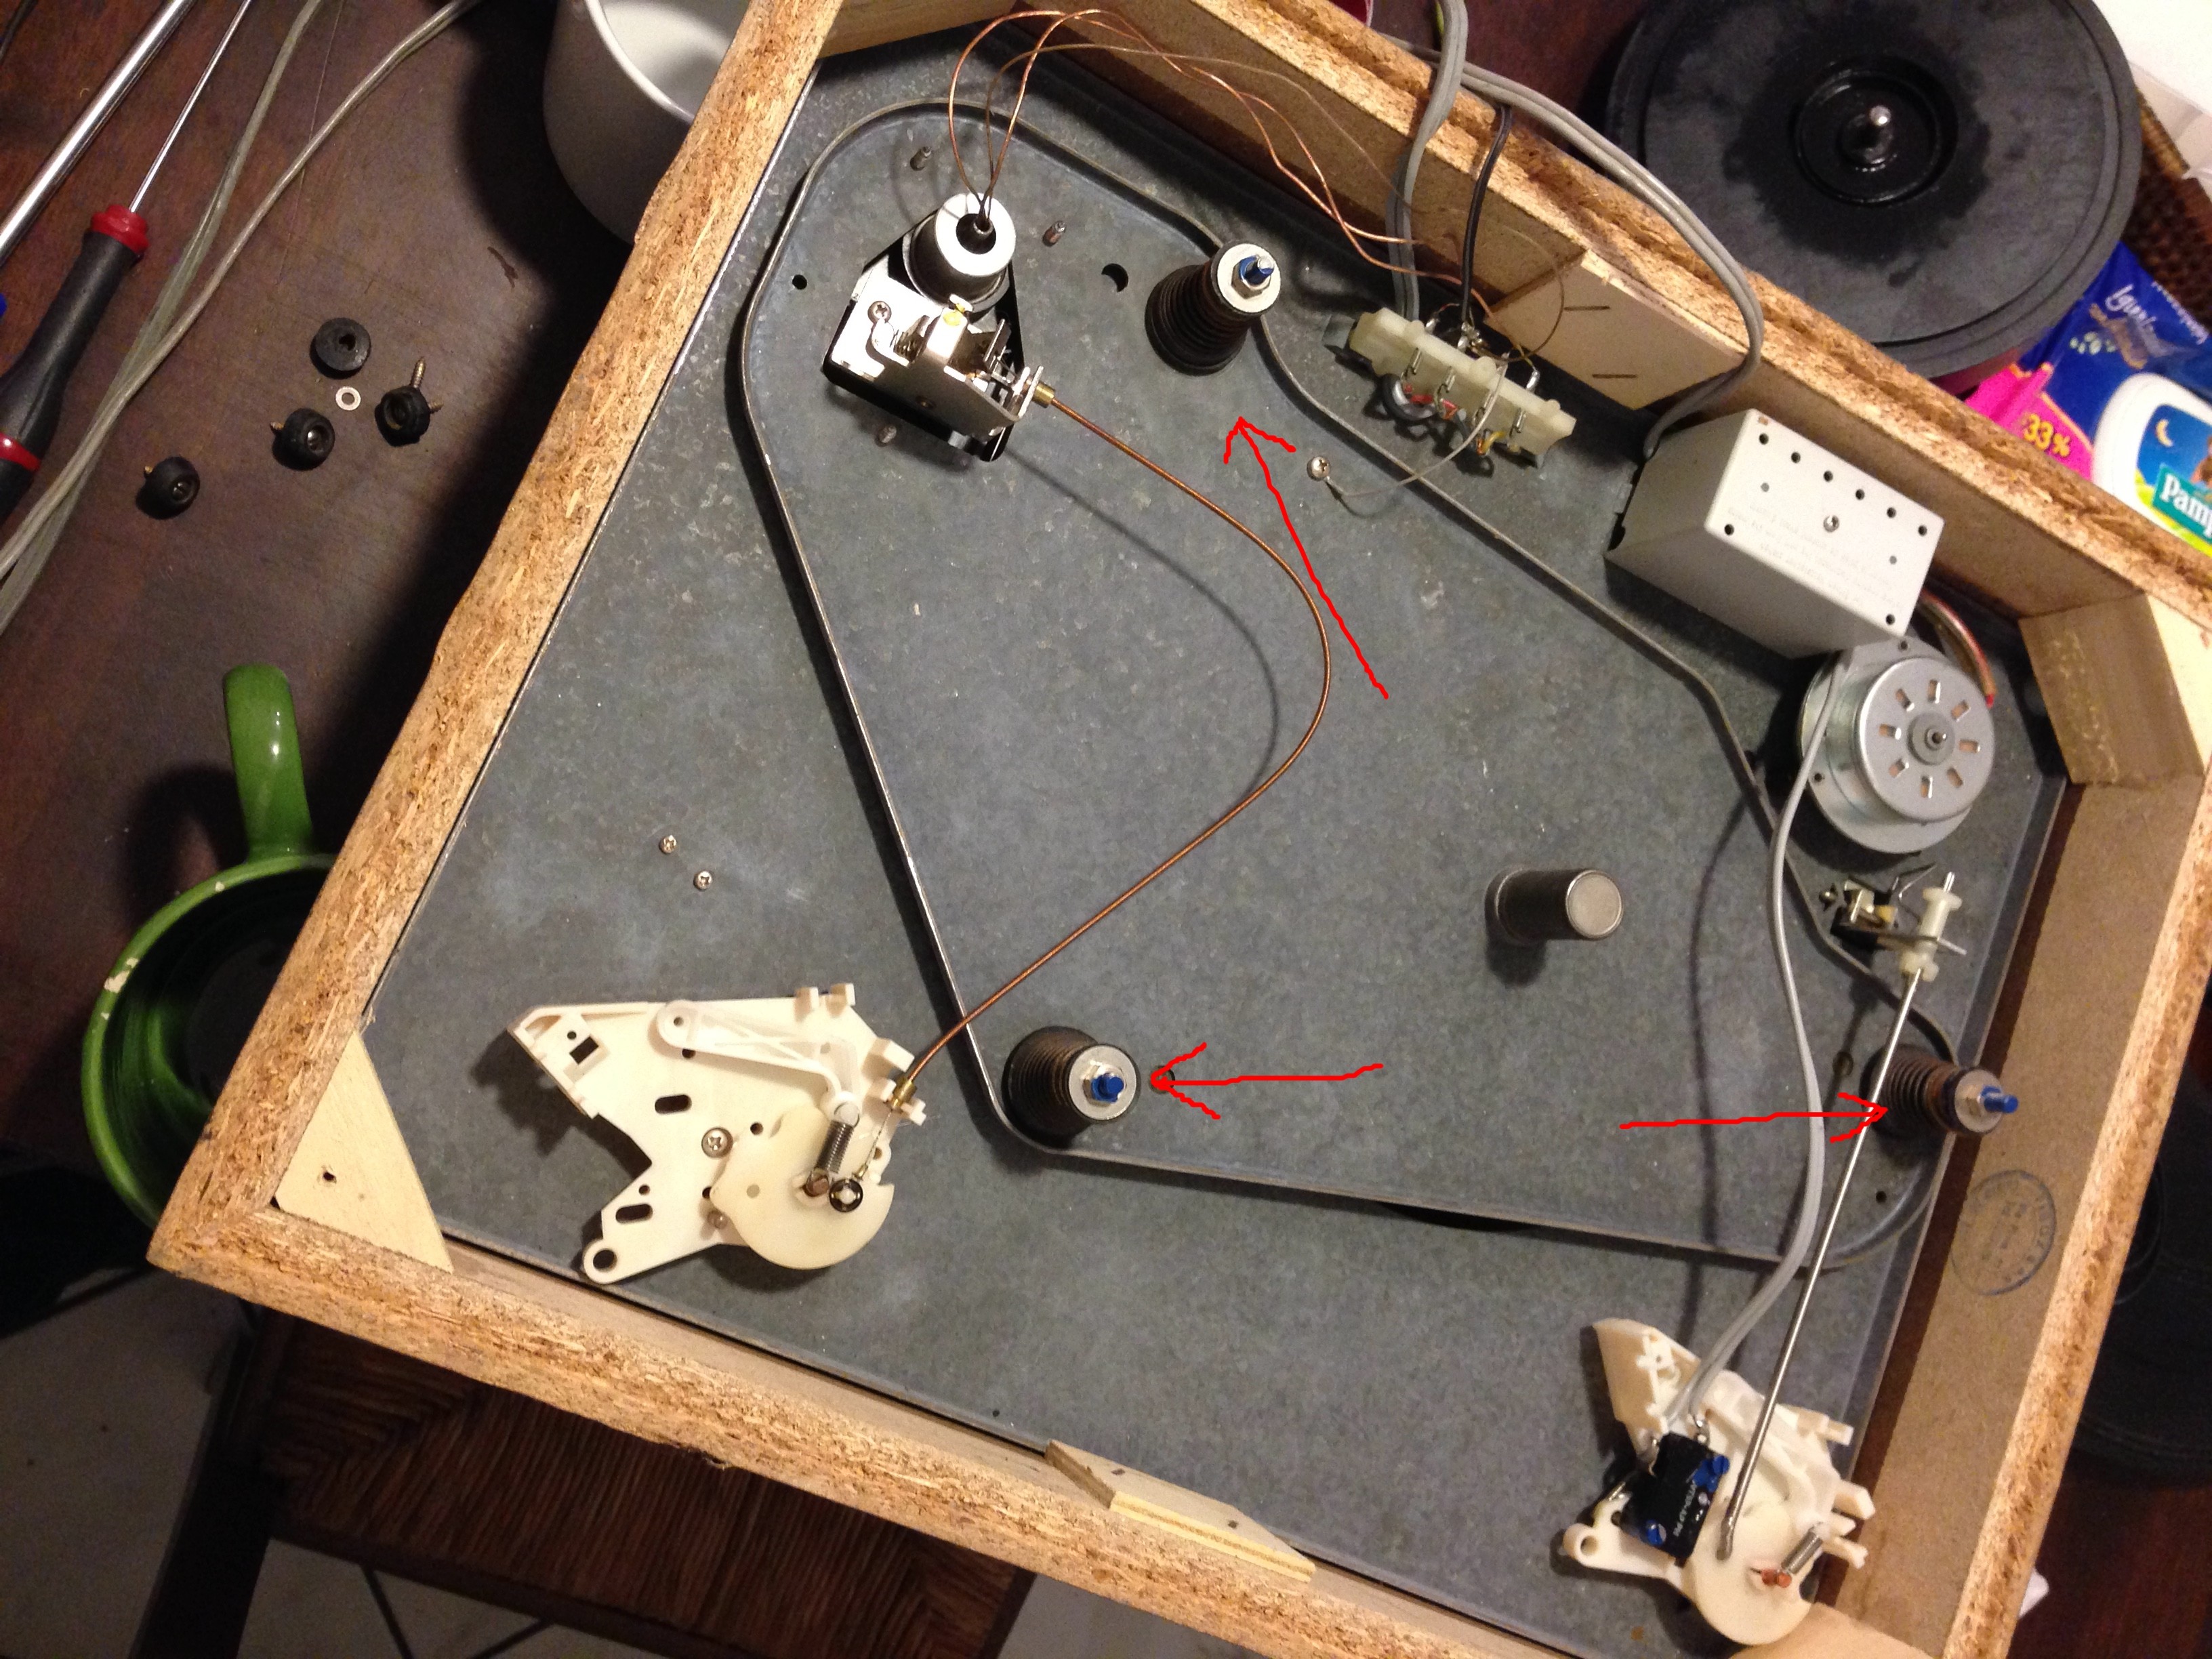
In the picture above, the red arrows indicate the three springs that mechanically isolate the subchassis from the top plate. The springs provide the suspension, which is aimed to smooth external vibrations, mainly those form the loudspeakers, and to isolate both subchassis and tonearm from the environment. The suspension assembly must be disassembled using the proper tube screw for the adjusting nuts size. It would be good to tag them with different colors so to remount them back to where they originally were. Each part (spring, washers, grommets, nuts) must be cleaned with water and dishwasher soap rubbing metal parts with an iron sponge. Everything must then be stored in a plastic bag with talc powder for rinsing, together with the belt. The sponge inserts can be gotten rid of, they are of no use. In the rare case the springs could no longer do their job well, they should be replaced.

Thorens suspension assembly
In the meantime we can apply some dampening material such as blue or white tac (a waterproofing material used in Italy in building construction). Bituminous (tar) adhesive sheets used in automotive mods can also be cut and stuck to the inner plinth walls or under the subchassis. When the spring assemblies are back in place, the Thorens will be turned back to its upright position. Check that the three springs are centered so that the tonearm base edges do not touch the top plate while freely oscillating vertically. This is achieved by rotating the springs so they direct their push in the correct direction – use patience, a trial and error process. Oil for lubricating guns or sewing machines can be used on the subplatter bearing shaft and its housing. When putting the subplatter back in place, insert the shaft in the well avoiding to push it down, letting it descend by it own weight. Now we can put the belt back and proceed to the suspension adjustment.
 Everything should be done with a record and a clamp (if any) on, so that the system will be in its normal working conditions. I used four aluminum cans to keep my Thorens uplifted in its place in order to access the adjusting nuts from below. It is a matter of adjusting the springs tension so that they bear the weight of the platter+subplatter-subcassis system and all the rest while keeping them suspended (picture at left): if too low, the subchassis rests on the transport lock wooden blocks (only on older models) – the subplatter would touch the top plate and would be unable to spin; if too high, the subchassis would lock under the top plate and the belt might slip away. With some trial and error procedure, screwing and unscrewing the adjustment nuts (two of them highlighted with red circles in the picture at left), we can achieve the optimal horizontal position where the system is free of bouncing vertically between the upper and lower constraints.
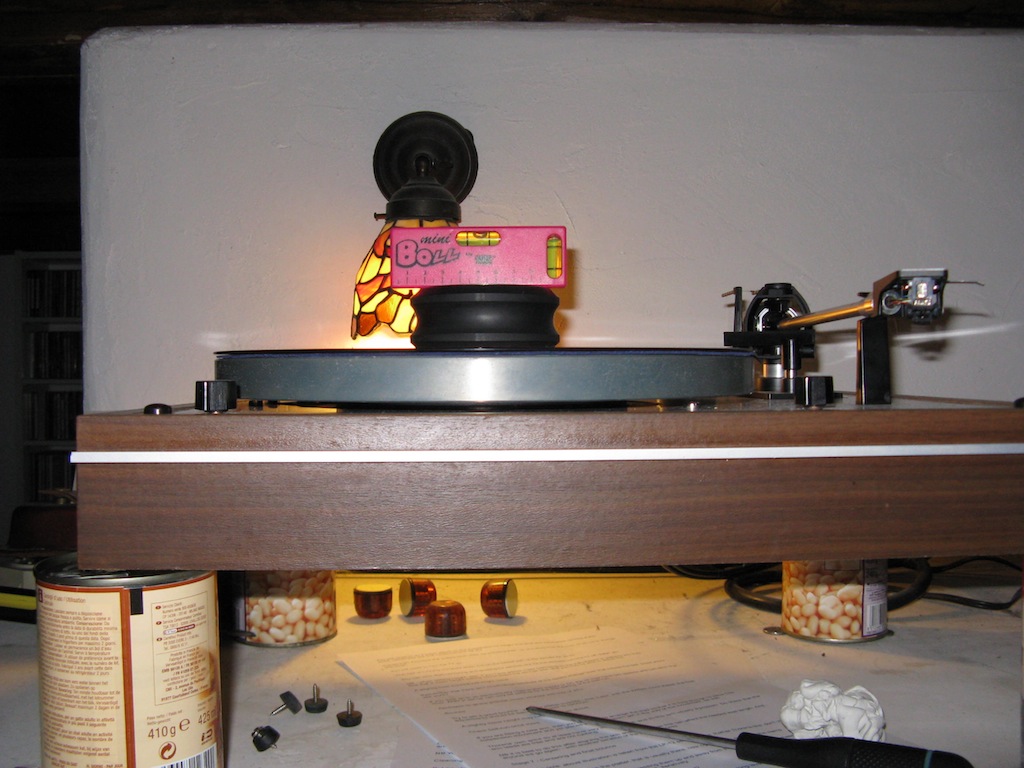 As the system begins oscillating freely, it is a good idea to make sure the springs are perfectly centered and that the tonearm base sits in its opening without touching any of the edges. With additional patience, we should use a bubble level while adjusting the springs further so that the platter can rotate on a perfectly horizontal plane (picture at right). Now we can remove the cans and store them for the next adjustment (maybe once a year?). We can check the efficiency of the suspension by gently tapping the record in the label’s area: the system should be able to bounce vertically and freely 6-8 times before progressively going to a halt. If this does not happen, we must restart the suspension adjustment from the beginning. If it still doesn’t work, maybe one of the springs, if not all, have lost their elastic properties with time and they are no longer able to bear the weight and dampen it. We could try by swapping their place or by replacing them all. It should be still possible to find them. But usually, Thorens suspension springs age very well and it is very rare they must be replaced. I found no point in mounting stronger springs such as Linn’s: it requires adding weight to the whole system and the bounce would become stiffer. I’m not sure this is better or worse. In my case, at least two of the springs (those highlighted with the red circles in the picture above) maybe have suffered a loss of strength. I was able to obtain a good leveling anyway, by tightening them almost all the way up. I’ve achieved a good bounce, though they seem to work at their limit; I’ve had reports from other experienced users that those two springs are usually to be tightened that way. So I’m probably good like this…